Sunday, September 12, 2010

And now for something knitted

Lots of sewing has been happening lately, its just been too rainy and too busy to get decent photos outside. So here's something knitted instead.
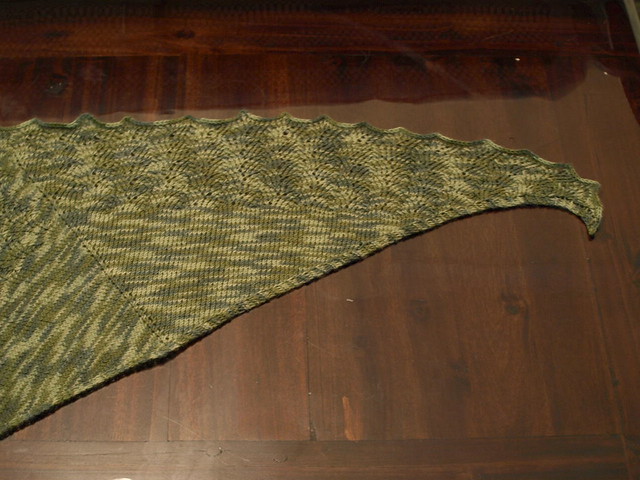
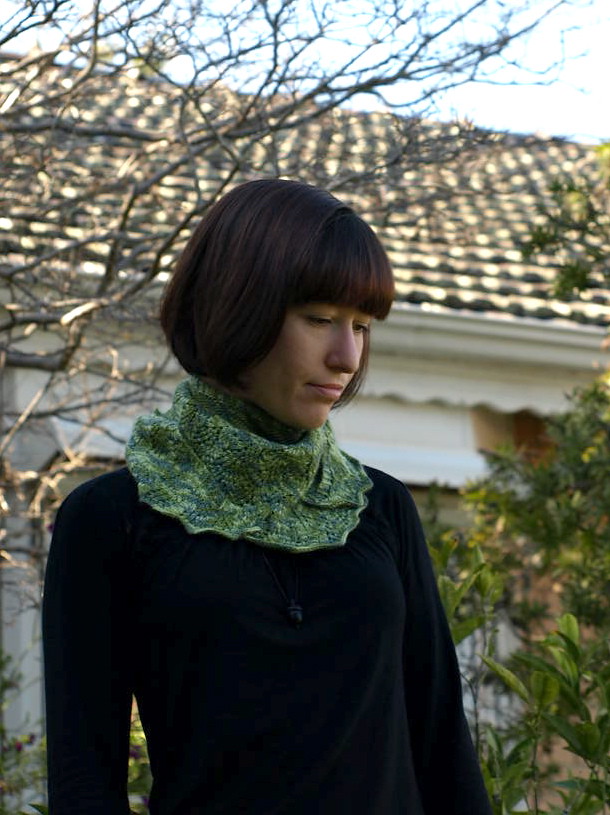
This scarf/shawl is from the pattern Ishbel, by Ysolda Teague, gifted to me by the lovely Kat as our planned knit-along. I was a bad knitting buddy on this one as I zoomed ahead and finished while I was recovering from having 3 wisdom teeth removed. Fortunately, this project was far less painful. It starts off a bit weirdly, from the centre top, and grows outwards with 4 increases on each increase row. The end result is a very flat triangle, with lovely scallop-y edges. I think it is my favourite knitted thing to date and one I am very proud of.

Wednesday, July 21, 2010

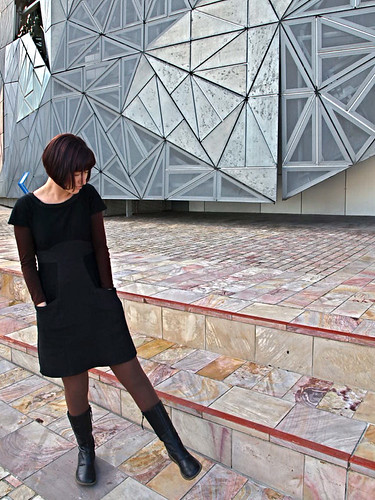
Another Rooibos, aka the Melbourne Dress


So named because I wore it a couple times on a week-long work+fun trip to Melbourne, and because it is grey and black, two colours I associate with the my favourite Australian city when she maintains her chic-ness while bunkered down for winter.

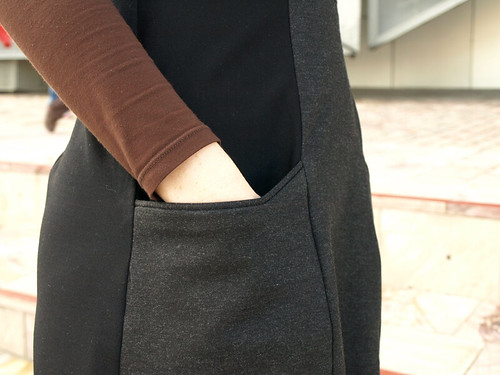
This was very quickly whipped up from some leftover black and grey double knit and required an awful lot of creative laying out to be able to get every piece out of the very small amount of fabric I had. No facings, no wee collar, no zipper, and I extended the sleeves into little cap kimonos.

Of course, I kept the pockets (pockets!!) and the piping that trims them. Man, I do love a dress with pockets.

I find this an incredibly easy-to-wear dress that handles variation well depending on what is worn under it. I reckon I'll be able to stretch it into spring with a collared short-sleve blouse under it. Better get cracking with that load of Japanese cotton I picked up from Tessuti.

Saturday, May 22, 2010

Awesome coat of awesomeness


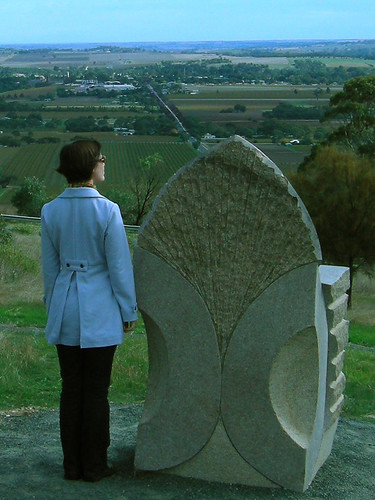
So I was on a wisdom-tooth-extraction-imposed sewing hiatus. I had recovered enough to start work on a light-weight coat and finish in time to take on a working weekend in the Barossa Valley. Yeah, my work is hard.

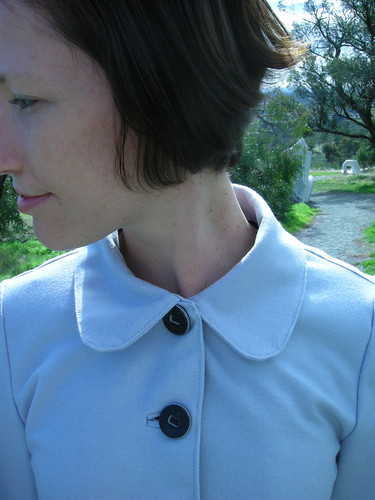
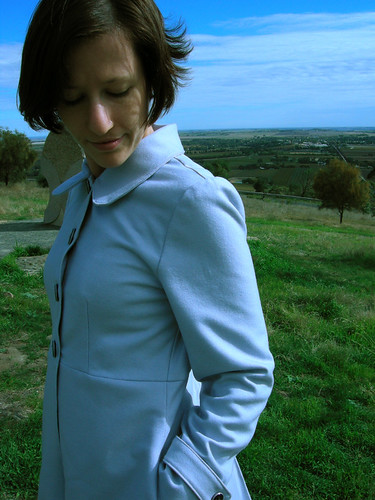
I am incredibly happy how this little coat turned out. It truly is one of the most awesome things I've made. Made from Butterick B5145 in a fairly lightweight wool flannel, it's fully lined and just fits perfectly.

A couple firsts for me on this one:
- First proper coat (I had attempted twice before to use shirt patterns to make light jackets with not terribly wonderful results)
- First fully-lined sleeve. All my lining attempts to date have been on skirts and sleeveless dresses.
- First bound buttonholes. And oh my, I think I'm hooked. They always looked so scary but I used the instruction form my 50s high school dressmaking textbook and they turned out wonderfully. A regular buttonhole just wouldn't have done this coat justice.

Another big firs was that I've noticed how much more willing I am to go back and fix little errors I would have let go in the past. I noticed after piecing together the whole front that the bust darts wasn't quite parallel. I probably would have left it in the past, but it was actually a really simple fix.

The set-in sleeves gave me problems too. The first attempt left waaaay to much ease, giving the shoulders far more puff that I wanted (or than was in the pattern illustrations). I've read lots of people complaining about some commercial patterns having far more ease in sleeves than is needed. This explains issues I've had with some other blouse patterns I've used. So I ran another stitch line across the shoulder, cutting about about 1" of ease at the apex and voila! Perfect, sharp shoulder without the shoulder pads called for in the pattern (I have a child-of-the-80s fear of shoulder pads).

The fit is so lovely and the full lining makes it so very nice to slip on (with navy and white polka-dot lining in the sleeves 'cause I ran out of navy!).

Oh yeah. And it has the most gorgeous buttons. And pockets. Pockets!!


Wednesday, April 07, 2010

Its about learning, right?


Believe it or not, this is Vintage Vogue 1044, which I have used to make two tops. I made this over a year ago and it was my first attempt at the pattern as a full dress, though I made quite a few alterations:


  • I used a lovely printed jersey, which really changed the fit and drape of the dress, not necessarily for the better.
  • As it was a jersey, I omitted the back zip. The whole thing pulls over the head.
  • The full skirt uses an insane amount of fabric, which I didn't have, so I changed it into a much less full skirt and gathered it onto an elastic waistband. Stitching the skirt to the bodice got a bit mucky so a made a matching tie belt to hide the waistline.
  • Finally, I made this in my "Interfacing? Bah! I don't need interfacing!" phase, so the lovely split neckline just flopped open. I stitched it together at the points but it's not brilliant.


So, in hindsight, a few too many corners cut on a lovely vintage re-print pattern. I'll try it again in a more appropriate fabric and feel comfortable I could pull off a much better result.


St Patrick's Day top


So two nights before St Patrick's Day this year, I decided to whip up a green top (as I had none) out of a very light emerald crepe I'd picked up on sale. This was my first attempt at drafting a pattern form scratch, following the process for creating a bodice block described in a 50s dress-making book I picked up at an antique shop not long after we arrived in Adelaide. I've since spotted copies in other shops and found at when I saw a set of 4 together at a vintage clothing fair that they were a required textbook for high-school sewing classes. Neat!


Very clear instructions and after about 2 hours measuring, marking up, cutting and basting, I had a perfect muslin, completely my own. The next night, I unpicked the sewn-together muslin and traced off the pattern onto my crepe and in less than an hour, I had myself a nice little cap-sleve blouse.


I'm happy with it as a first attempt, but the facings didn't come off right. I think this was mostly due to not enough notching in the seam allowance before turning and pressing. Basically, the curved scallops look to squared.


But it has given me the confidence to try more drafting rather than having to rely on bought patterns.

Friday, April 02, 2010

First Collette Pattern: Rooibos


Due to me giving an incorrect address TWICE, I had to wait ages to finally get my hands on two lovely patterns from independent pattern company, Colette Patterns (their customer service is fantastic, by the way, even when the fault was completely mine).


Rooibos is a princess-seamed above-knee dress with an underbust band, side zip, a very wee collar and pockets. Pockets! It also gave me a perfect use for the beautiful green floral bias tape I picked up ages ago in London. A very nice accent to the purple slightly stretch georgette.


Rooibos was wonderfully easy to sew, though I had a bit of a muck up with the sizing. I have given up trusting all pattern sizing and always add extra ease through the hips, no matter what the pattern measurements are. This generally works. However, Collette pattern measurements are *gasp* real! So I ended up having to take an extra 1/2" out of all the skirt seams, after I'd sewn it up. Grrr... I also lengthened it to just below knee because me + above-knee-skirt = Badness.


That said, I will cut this a size smaller again next time. By the measurements, I'm a US size 4, but I definitely should go down a size. That means I'm a US size 2?!? Seriously? It only goes down one more size to 0! I think there's some serious vanity sizing going on these days in the US. I was never less than a 6 in Canada, but that 10 years ago (my measurements are still pretty much the same). Anyone else found this with Collette patterns?

Peggy Olson Dress: Take 2


It's a beautifully sunny, not-to-hot start to the long weekend and I've had a very successful morning. After cutting the lovely light-weight tweed and bright blue lining for my second go at Simplicity 8673, I got stuck into sewing up after a bit of a sleep in and lazy breakfast.


It came together much more easily this time, although I still had to eat into the seam allowances over the hips again. Guess I wasn't that great at transferring ALL adjustments to the pattern pieces after last time.


As planned, I changed the underbust gathers to tucks, narrowed the skirt at the hem by 1'1/2" on each side and enlarged the armholes. I'm completely chuffed at how it came out. Despite the cut being very fitted, the tweed has a tiny bit of give to it, which makes it surprisingly comfy.


I love this pattern, now that I have it adjusted to my figure. I think I'll do View C with the flared skirt in a gingham or poplin for spring. But not just yet.

Monday, March 29, 2010

An oldie but goodie

So while I was back in London, I used a tiny remnant of gorgeous striped silk jersey from my favourite fabric store ever, McCulloch and Wallis, to make this little top. Again, I used the yoke and bodice shapes from Vintage Vogue 1044. Problem is, that as I had very little fabric to work with, it ended up really quite short. But with my new high-waisted skirt, I could finally wear it without any unsightly belly-bits protruding. Win!

And here is a gratuitous covered-button and loop shot from that high-waisted skirt.

Sunday, March 14, 2010

Duct-tape dress form

I've been wanting to make a dress form for ages, ever since reading a couple tutorials from people who had made their own forms, rather than shelling out $400+ for a store-bought, adjustable one. So this morning I set too it, or rather, Mike did as there was no way I could wrap myself neck-to-ass in duct tape.

All up, it took about 2 hrs and turned out really well. The measurements are spot on, after a bit of padding to compensate for the fair amount of squashing that the duct tape did to my boobs. (Me: Mike, does this seem right to you? Mike: *cup, cup* Add a bit more to the left one.)

The process is pretty basic. Put on an old t-shirt and cover hips with a tube a fabric (in my case an old tank top with the straps cut off). Wrap carefully in strips of duct tape, with the tape-er being careful to stay as close to the body as possible (e.g. minimal squishing - I am rather squishy after all - and no stretching across bits). The tape-ee's job is to stand as still and posture-perfect as possible. Tricky.

Once covered in 2-3 layers of tape, cut up the centre back, remove, tape back together and stuff. In my case I also had to bulk up the afore-mentioned squished boobs.

I've added a coat-hanger into the shoulders for now, which should let me use it for skirts, dresses, pants without needing a stand. It will definitely be used this week for the tweed version of my Peggy Olson dress.


Monday, March 08, 2010

Peggy Olson dress, high-waisted skirt, and covered-buttons all over the place

With the impending start of a new job bringing the end of my unemployed free time, I spent last week in a mad flurry of sewing activity. What resulted was, in addition to a few long-needed mendings and hemmings, three new pieces to hang in my closet. I have definitely found that my skills have improved over the last couple months, owing entirely to reading and planning and not actually sewing. Very cool.

All three pieces were from re-printed vintage patterns, though two were pretty significant modifications of.


First up, a muslin of Simplicity 3673 (view A), which turned out well enough to be wearable. I call it my Peggy Olson dress as it is spot-on her style (which I love). I absolutely love the clarity of instruction in Simplicity patterns, especially when compared with the sometimes esoteric ones in the Vogue patterns I've been sewing more recently. I did have to make a few alternations to the basic pattern tho.
  • As suggested in quite a few reviews, I fully lined the dress (in bright orange!), instead of just the bodice. This made the final fit lovely to wear but was a major pain when I had to make a few alterations midway through.
  • I narrowed the skirt at the hem by 1 1/2" on each side to enhance the shape of the pencil skirt.
  • My usual dress fit alteration of cutting a size smaller on top and grading to a larger size through the hips didn't really work for the close-cut wriggle-skirt shape of this dress. I first thought it was because I had decided not to do my usual waist-lengthen adjustment too (didn't think it needed it after measuring) but it turned out to be more around where the hip was sitting as well as needing to adjust for a "sway back", or as I like to think of it, a small waist followed by a slightly protruding butt. Amazing how much you learn about your own figure when adjusting a very tailored dress like this.
  • I also shortened the back at the centre only - basically took two darts out above the underbust band - as it just wanted to gape there.
  • And I omitted the buckle in favour of two covered buttons. I currently have a thing for self-covered buttons.
I was very meticulous in transferring all these adjustments onto
the pattern pieces - not doing this is a very bad habit of mine - which I'd already backed with fusible. I do this with patterns I know I'm going to make again and again.

Things I'm not happy with and will fix in the next version:
  • The gathering under the bust. Ack. I need to take out some bulk here or maybe change the gathers to darts and be done with it.
  • Because of the alterations I made to the length of the bodice back, the zipper ended up really short and high. This means the dress only goes on over my head and with a bit of wriggling. Fun!
  • Use a friggin' dress form! This would have made the fitting soooo much easier and the final result much cleaner. Of course, that means having a dress form, which is an adventure for later today I think....


Next, a little blouse made of a bit of leftover Liberty print jersey that had also arrived in the from-London pile of boxes. It is very loosely based on another vintage re-print, Vogue 1044. This one went fine, aside form it taking longer than I thought it would given I had to cut out pretty creatively as I had very little of this lovely fabric left over form another project. And yes, I added another self-covered button at the neckline, this time with a loop fastening as well.

And finally a heavy jersey skirt made using the same pattern as the Peggy Olson dress. I just made up the skirt pieces, cutting the front panels as a single piece instead of two, fit the hips perfectly this time, and lapped over 4" at the waist to form a facing. It look me less than two hours and I just love how it fits. It also let me
make even more refinements to the shaping of the skirt for my next attempt at this pattern. And I dealt with a bit of a gap at the top of the zipper with... yup, a self-covered button and loop fastening.

Monday, March 01, 2010

Things I've learned while not sewing

With the long-anticipated arrival of our boxes of stuff from London (including my sewing machine!), we spent most of Saturday unpacking and setting up the now-dubbed Craft Cave. I then spent most of Sunday sewing, Simplicity 3672 to be exact. Having not sewn a stitch since leaving the UK at the beginning of December, I was thrilled to find that I think I've actually improved. I owe this mostly to the amount of reading I've done on techniques etc while waiting for my machine to arrive. After a brief vacant moment when I seemed to have forgotten how to thread my machine, I stormed ahead on an awesome pattern and found that I now:

- Understood the reason for stay stitching and actually didn't ignore it.
- Have a better head for thinking in 3D which made it much easier to adapt a partially-lined dress pattern to fully-lined with minimal fuss. It was very satisfying to turn the who lot right-side out and find I had a perfectly lined dress.
- Am more patient when it comes to properly marking and notching when cutting out. This makes life sooo much easier during construction.

However, I still:
- Need to make a dress form. Its just too damn tricky to adjust a tailored fit without one. M is looking forward to wrapping me in duct tape for this.
- Need to remember to always lengthen the midsection of dresses by 1 - 1 1/2", no matter what. Just holding the pattern up to me and thinking it'd be right does not work. I must accept my long-waisted-ness and learn to love it. Fortunately, I've been able to lengthen the underbust band and all is not lost.

With our Craft Cave now in full operation, I'll be madly sewing again, especially for the next couple days before I finally go back to work. Hopefully with a few new pieces in my wardrobe.

Thursday, February 18, 2010

Finnegan begin again

I've decided to revive this here blog, as I'm a bit pissed off at myself for having mostly stopped writing since moving to London. Maybe it was something about the place that discouraged me or rather encouraged me towards other creative forms, but I'm back in Aus now and words are starting to rattle about in me again. I also want to better document those other creative forms; namely knitting, vintage dressmaking, and now small-scale veg gardening. So here I go. I'm also giving it a new colour scheme after 6 years of stark black.


But first, a small note on three pieces of advice I've been given which are in my head this morning and have become more relevant recently, with regards to marriage and relationships.


First, from my father, given while I was in the midst of some serious teenage angst following my parents' divorce. He told me that the world was not so black and white and that I would be happier if I would recognise and appreciate the many shades of grey that were there. This describes well the tolerance and broader appreciation for all sorts of wonderful weirdness and ways of approaching life that I wouldn't have thought of for myself that I think I've developed over the past two years.


Second, from my grandfather, on Mike and I's wedding day. He said that men and women think differently and have different priorities and that we should keep that in mind in order to have a happy marriage. This one reminds me that we don't have to be on exactly the same wavelength to be happy together. It's the harmony of those different wavelengths that matters.


And finally from a new friend here in Adelaide, who will celebrate her 10th wedding anniversary this year after getting married at 19. She said that in order to survive the growing and changing that happens to everyone in their 20s, she accepted that she and her husband would grow at different rates and that at times they needed to be patient and wait for the other one to catch up. I hadn't really thought of approaching growth this way and I quite like the image of it. She also was married in the morning on April 1st, leaving friends and family wondering if it was going to turn out to be an April Fool's joke. I quite like the sense of humor in that.